library(tidyverse)
library(readxl)

nps_admit <- read_csv("data/nps-admissions.csv")
nps_release <- read_excel("data/nps-releases.xlsx")Lesson 19: Export Data
Introduction
In nearly all the lessons in this course so far, you’ve learned how to manipulate or visualize data that’s in R. But sometimes, you’ll also need to write or export data from R to another format for further analysis or to share with others. Two of the most common tabular file formats for data sharing are CSV and Microsoft Excel. This lesson will demonstrate how to write data frames to these formats.
For this lesson, you’ll need both the NPS admissions file and the NPS releases file. Read them in to R with the following code:
To CSV
One of the simplest data formats is comma-separated values, or CSV. This format stores data in a plain text file with commas and line breaks denoting values and rows. One potential downside of the CSV format is that there’s no way to indicate data types or other metadata about the file because it’s stored as a plain text file. So, when a CSV file is read back into R or opened in Excel, that program must parse or guess what data type is stored in each column. You should be especially careful opening CSV files in Excel; Excel may convert text to dates and remove leading zeroes.
To write data to CSV, use the write_csv() function. The first argument is a data frame to write, and the second is the file path and name of the CSV file that will be saved.
write_csv(nps_admit, "data/nps_admit_clean.csv")To Excel
When you write a data frame to Excel, string, numeric, and date columns are stored as columns of those types in the saved workbook. This avoids some of the potential issues discussed above about CSV files. One downside of saving files to Microsoft Excel is that Excel can only store files that have fewer than about 1 million rows. So, if you have a large dataset, Excel is not a good format.
To write data to Excel, use the write_xlsx() function. This function is from the writexl package, which is not part of the tidyverse, so you may need to install it before using it. Once it’s installed, it works similarly to write_csv() where the first argument is a data frame and second argument is the export file path.
install.packages("writexl")
library(writexl)

write_xlsx(nps_admit, "data/nps_admit_clean.xlsx")
Multiple sheets
One nice feature of write_xlsx() is that you can create a workbook with multiple sheets. To do this, first make a list of data frames. A list is an R data format that has not been discussed in this course. lists are much more flexible than data frames. They can contain many different types of data and be nested in a hierarchical format. Working with lists is a more advanced concept that will not be covered in this course.
Chapter 23 of R for Data Science discusses hierarchical data and lists.
For this example, create a list that contains two data frames—nps_admit and nps_release—using the lst() function.
nps_to_write <- lst(nps_admit, nps_release)
nps_to_write
$nps_admit
# A tibble: 11,475 × 6
year state_name state_abbr adm_type m f
<dbl> <chr> <chr> <chr> <dbl> <dbl>
1 1978 Alabama AL adm_total 2631 184
2 1978 Alabama AL adm_new_commit 2115 148
3 1978 Alabama AL adm_viol_new 0 0
4 1978 Alabama AL adm_viol_tech 150 5
5 1978 Alabama AL adm_oth 155 31
6 1979 Alabama AL adm_total 2596 223
7 1979 Alabama AL adm_new_commit 2314 178
8 1979 Alabama AL adm_viol_new 0 0
9 1979 Alabama AL adm_viol_tech 68 2
10 1979 Alabama AL adm_oth 214 43
# ℹ 11,465 more rows
$nps_release
# A tibble: 4,590 × 8
year state_name state_abbr sex rel_total rel_uncond rel_cond rel_oth
<dbl> <chr> <chr> <chr> <dbl> <dbl> <dbl> <dbl>
1 1978 Alabama AL m 2823 1070 1485 252
2 1978 Alabama AL f 161 46 92 20
3 1979 Alabama AL m 2790 723 1777 272
4 1979 Alabama AL f 215 33 174 8
5 1980 Alabama AL m 3264 524 2173 552
6 1980 Alabama AL f 188 24 147 16
7 1981 Alabama AL m 2973 520 1695 746
8 1981 Alabama AL f 221 20 137 63
9 1982 Alabama AL m 2919 1097 1451 349
10 1982 Alabama AL f 172 44 118 10
# ℹ 4,580 more rowsWhen you print nps_to_write, notice that both data frames are returned. Next, use this list to write to Excel. Each element of the list will be saved as a separate tab in the Excel workbook.
write_xlsx(nps_to_write, "data/nps_clean_tabs.xlsx")
If you have more complex Excel exporting or formatting needs, the openxlsx package has additional features that may be useful to explore.
Write multiple files
This is a bonus example that uses lists and iteration to write multiple CSV files in one command. This technique is more advanced and beyond the scope of this introductory course but seeing an example can demonstrate the power of learning additional programming concepts and skills.
Chapter 26 of R for Data Science is a good introduction to iteration.
The basic idea of iteration is that you repeat a function or operation over multiple elements, doing the same thing to each element. For this example, the goal is to write one CSV file for each state in the nps_admit dataset. Instead of writing one CSV file, you will write 51 CSV files! Start by creating a list of data frames from nps_admit, one per state.
nps_admit_list <- split(nps_admit, nps_admit$state_abbr)Iterate over each state’s data frame in the list and write each data frame to a separate CSV file. Use the name (idx) of each element in the list to add the state abbreviation to the name of each CSV file.
iwalk(nps_admit_list, \(x, idx) write_csv(x, paste0("data/nps_admit_", idx, ".csv")))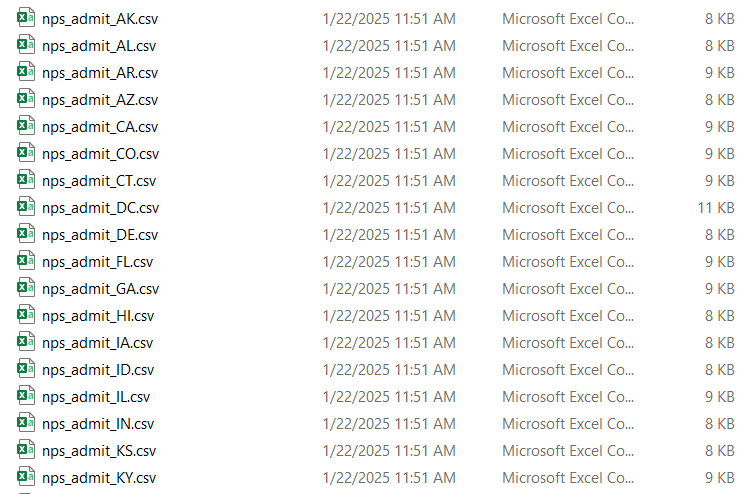
Iteration or looping is an extremely useful technique for increasing the efficiency and quality of your code. As you continue learning R, learning these functional programming techniques will be key to your advancement.
Resources
- writexlsx R package website: https://docs.ropensci.org/writexl/
- openxlsx R package website: https://ycphs.github.io/openxlsx/index.html
- R for Data Science (2e), Chapter 23 Hierarchical data: https://r4ds.hadley.nz/rectangling
- R for Data Science (2e), Chapter 26 Iteration: https://r4ds.hadley.nz/iteration